I've been counting sleeps!Yesterday, I put my last edition for now to bed (Sir is back next week) and from today I'm on two weeks' holiday.As soon as we've finished breakfast, and maybe a coffee, we'll pack and be off.I've put together a couple of boxes of things to do — watercolours (it's been years and years!), drawing, knitting and crochet — and to read, like the gorgeous cookbooks we got for Christmas and haven't had time to glance at. We've packed the wii and games, I've even dug out my bathers and there's a hat on my bed waiting to be packed.
 My eldest son is already down there with our grandson, and our grand-daughter will be with us next week. Lily's coming down with Nick in a few days, and Will will arrive on Monday with two of his mates. My best friend Dace is coming for a weekend, and everyone else is welcome to arrive at a moment's notice.And on top of all that, we have a forecast maximum of just 29C today (84F) and it's started to rain — very happy.{Today's lovely pics are of textiles and colours in the home of Scottish designer Fiona Douglas, via Design Sponge. I'm looking at images of bedrooms with an eye to re-painting and brightening up our bedroom down south, and if I could get it to look like this, I'd be in heaven ...}
 {From Italian Villas, via Desire to Inspire} I thought you might like a little Sunday outing — to Castello di Reschio in Umbria, close to the Tuscan border.
  Simple furnishings, uncomplicated colour schemes, airy rooms and lovely views.I reckon I could whip up a mural like this really easily ... very effective!
 :: I'm sewing today — finishing off yesterday's quilt top and a couple of pairs of pants ready for our summer break next week.Things were going well with the pants until on one pair I discovered that instead of sewing each of the two front pieces to the two back pieces, I'd sewn the fronts together and the backs together — so one leg is a totally different shape and size from the other.You may ask why I didn't just unpick and start again, and the answer is that I couldn't be bothered — by the time I'd noticed, I'd finished off all the raw edges and was up to the waistband.
Anyway, I finished them and they will do for holiday wear. They are lovely, comfy, very lightweight cotton pants that look really odd but feel okay!
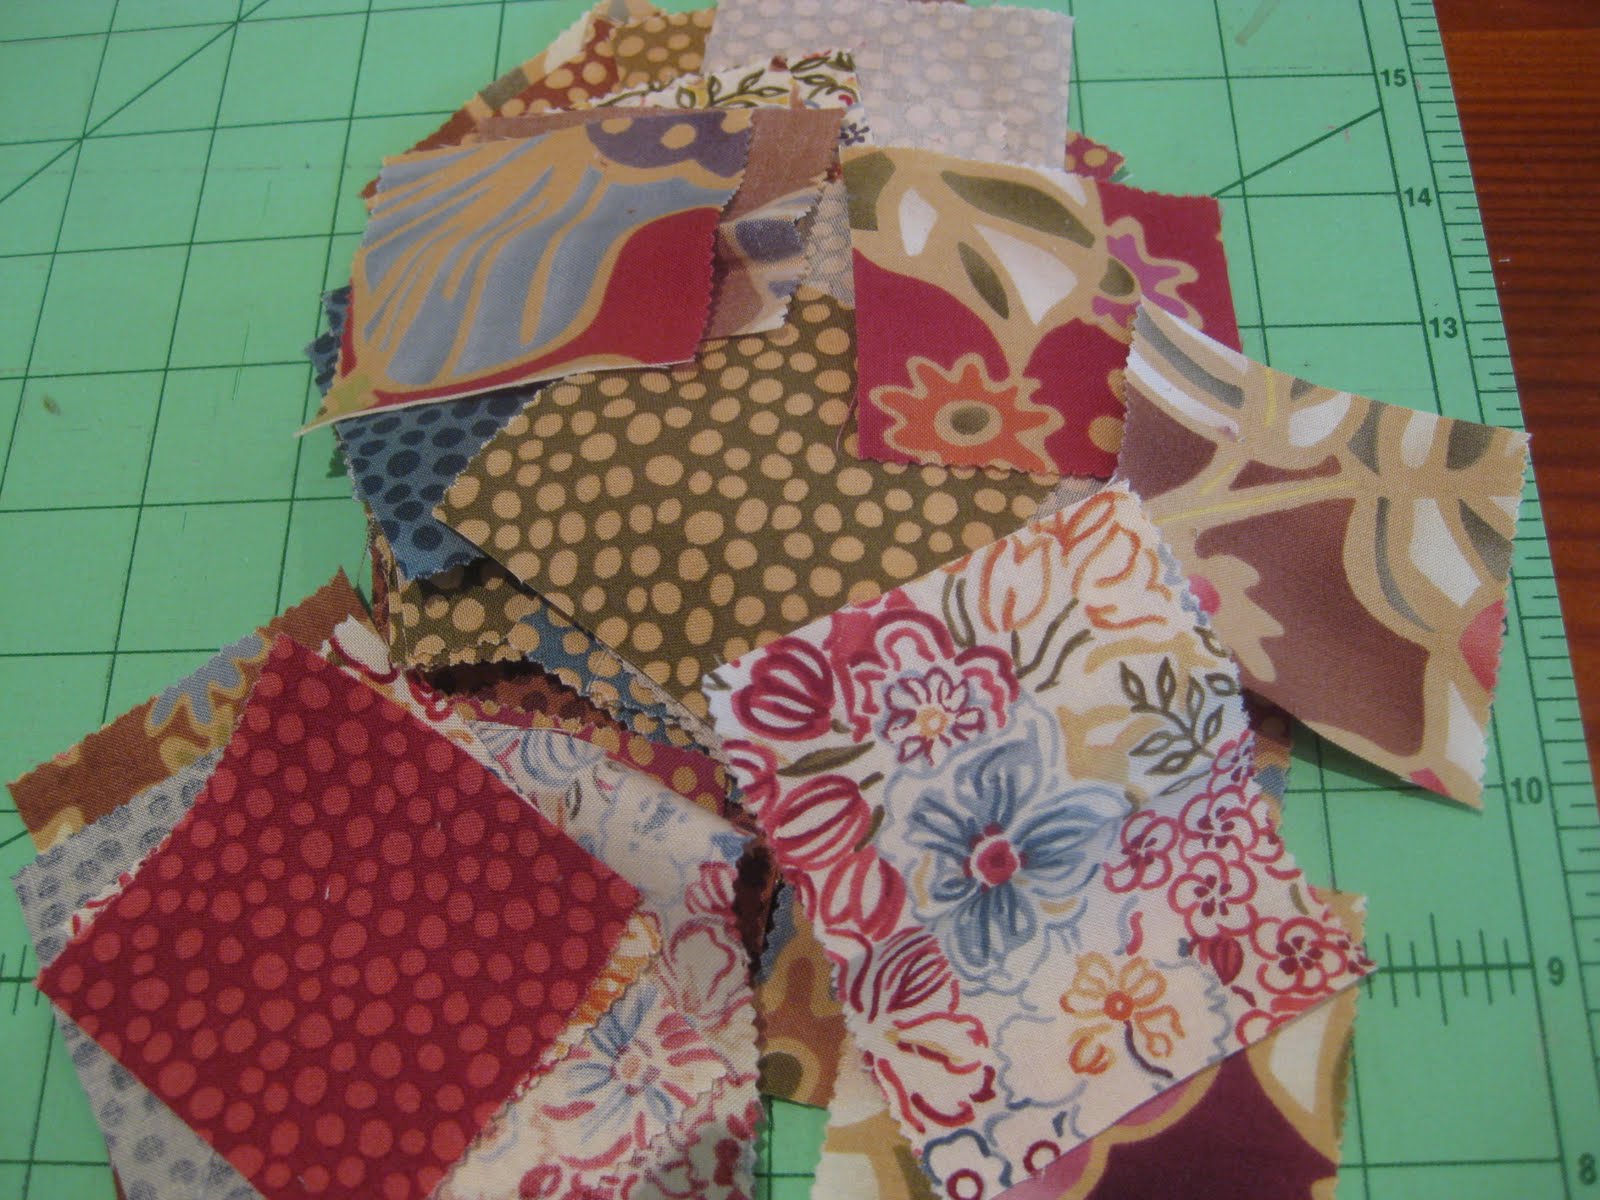
Here's a brief tutorial about one way to use a jelly-roll of fabric — I'm not an expert quilter by any means, so I feel a bit out of whack giving anyone tips, but this is such a quick, easy and foolproof way to piece that I wanted to pass it on.Usually I go for more relaxed, unfussy quilts and if my corners don't meet, or something's a bit wonky, I let it go and get on with more important stuff. I don't get too anal about things.But this a quilt I'm making for my sister-in-law, so I really wanted to do a good job, which is why i decided to use this technique.Jelly-roll is the kiddy name (don't ask me why) given to a tight roll of fabric strips already machine cut to 2.5 inches wide (everything in quiltland is archaically imperial — I blame it on the US).{Added later: Of course, you can just cut your own squares of fabric — you don't need a roll. The advantage is that the strips are very accurately cut (a bonus for slapdash old moi), and they coordinate — but you really can't see exactly what you've got until to untie and unroll it to inspect. This one I'm using is from Moda.}You will need some super-light, gossamer-fine fusible interfacing.And a good supply of tea, and, once you get to the sewing, some good music (Cecilia Bartoli for me today), or podcasts, as the stitching is so easy and straight it's really, really boring.1. Okay — the first step is to cut the jelly-roll strips into squares.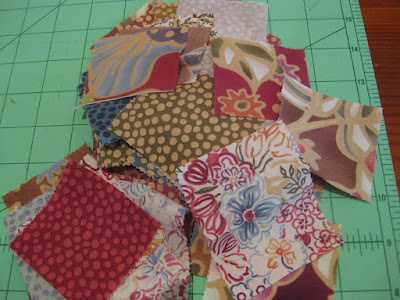 I'm making my quilt top with nine panels of seven by seven squares, which I'll put together with sashing in three rows of three. So these instructions are for that — they can be adapted to make whatever you fancy, so long as the piecing is basically square or rectangle-based2. Draw a grid of 2.5-inch squares on the non-adhesive side of your interfacing.3. Turn it over so the glue side is up, place it on a nicely flattened folded towel — a light-coloured one so you can easily see your pen lines — then lay a fabric square neatly in every marked square on the interfacing. And remember: this is now adhesive side up.
 4. When you have your pieces all arranged as you want them, and all neatly in place, gently put a cloth over it all, spray lightly with water and press so all your pieces will fuse with the interfacing. The next pic shows how it looks on the other side:
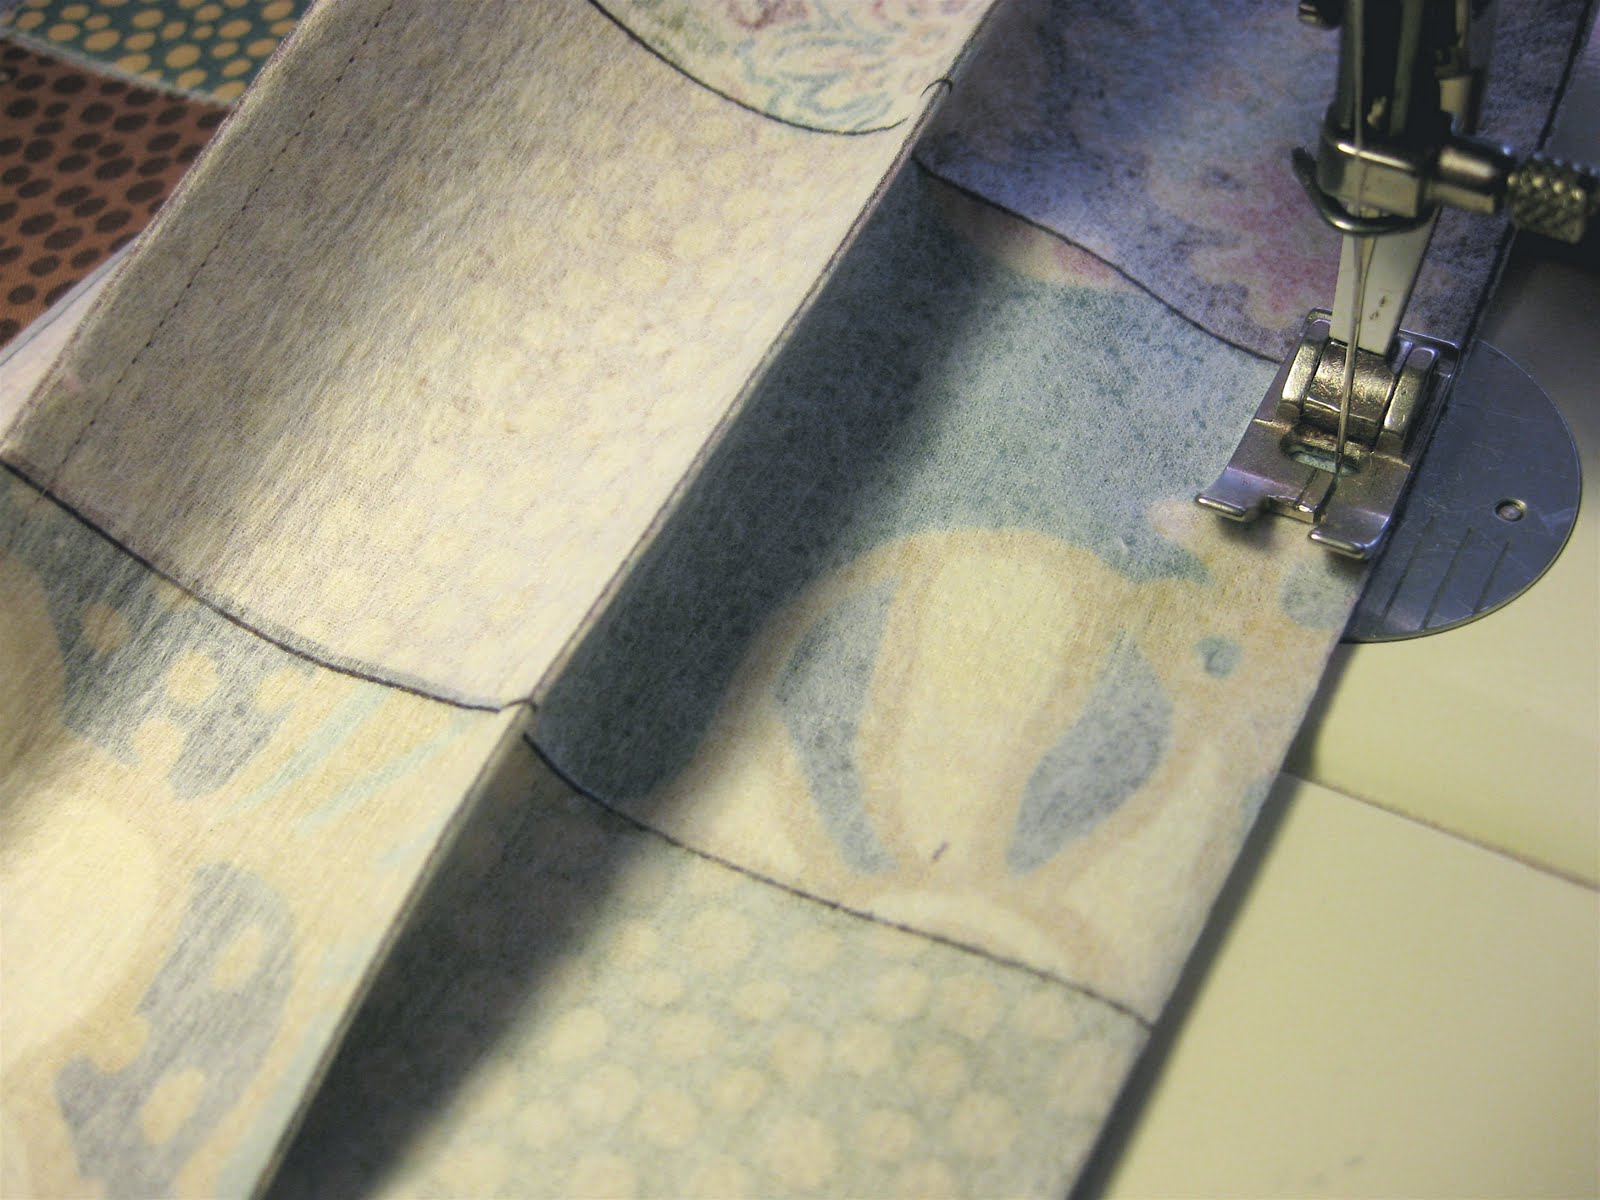
 5. Once firmly stuck, lift the whole panel up, and fold right sides together along the first marked line (horizontal or vertical). You'll find this will happen very easily, you won't need to iron or pin anything. This is s-p-e-e-d-y piecing.6. Stitch the fold — I used a quarter-inch seam allowance (even my 40-year-old Bernina is metric, but with the needle off centre, I was able to use the edge of the presser-foot as a guide.
 7. Do the same for all the marked lines going in the same direction, then take your lovely sharp scissors (the ones you keep just for fabric!) and snip what we in newspaper trade call a poofteenth off the edge of the folds.
 Press so all the seam allowances lie neatly to one side.
 8. Then repeat steps 5 and 6 working on the perpendicular folds.
 9. Press persuasively, making sure all the seam allowances lie the same way, gently pulling the fabric away from the seams so there are no puckers and everything ends up good and flat. Turn it over and voila!
 Perfect piecing, done in a flash, with every damn corner sweet, sharp and ship-shape, yessir.
 David and I took Lily and Nick for lunch at Clancy's Fishpub at City Beach today. It sits right on top of the beach, looking over the dunes to the sea — an amazing location.
  It's been open only a week or so, and the colourful, friendly, beachy atmosphere is bound to be a winner. We loved the fun, bright decor — especially the overhead light fittings festooned with what look like beach towels!
 These are little sea-urchin lights hanging from craypots ...
 ... while this is superb!
 Fish hooks embedded in thick glass.The sky was a little overcast today, so the ocean wasn't its usual fluorescent turquoise, but Clancy's owner Joe Fisher reckons when the beach is that typical WA blue and white, the whole place sings.:: It was my gorgeous Will's 21st birthday on Wednesday, which means all my kids are now officially grown-up, even if turning 21 doesn't mean anything of any real significance these days. We kicked off the celebrations with a family barbie. I had to work until after 6pm, so Lily and David did all the work — it was fabulous.
I'd gone to bed when I realised I didn't have a picture of Will on his birthday, so I got up and we took this very bad shot! :: Just one more week as Sir, and then I'm off for two whole weeks - yay! Bay here we come ...
 Lily went to Melbourne a few months ago and, knowing her mother well, brought me back this book.She also produced a pile of fabric and asked if, for her birthday, I would make her a few of the dresses in the book.Well, it was a while before I had the real time or brainspace even to look at it, but we got together in the incredibly hot week that followed Christmas, pulled down the blinds, turned up the air-con and got stuck in.The dresses in the book are simple and beautiful — I'd like a few for myself as well.The sticking point is that the book is almost entirely in Japanese, and the patterns for all 26 dresses, in all sizes, are printed on just two sheets of paper, and the instructions are in quite small Ikea-style pictograms.
 So you need a clear head, lots of time, and a good working space.As neither of us knows any Japanese, we Googled a few blogs and websites written by people who had tried this book — including one bright spark who said: "If you can't read Japanese, just type the words into 'Google translate' and they'll do it for you." Honestly!
 But we did manage to glean valuable info about seam allowances (none allowed on the patterns), and decided our first dress (the one above) would be made from calico so we could gauge the sizing, and whether the patterns worked.
 We need not have worried: they are simply brilliant. Everything went together so easily, even sleeves. You can make one dress in just a few hours. We made all the dresses pictured here, including the one on the cover.It pays to have a little sewing experience so you can recognise the symbols for interfacing, grainline, stay-stitching and so on, but as you can see from the pictures of the dresses we made, they are all quite simple unfitted shapes, with no intricate tailoring or anything.
 I hope to get Lily to model hers so I can photograph them — they look quite different from those being modelled by the sad-looking little waifs in these pictures!
 {Pic: Estancia el Rocio, a guest house in Argentina, via An Indian Summer}
Twelfth night has come and gone, taking with it the tree and trimmings, all of which are now safely wrapped and stashed. This, for me, is the start of the new year, once all the Christmas hullabaloo has died away, the new calendars are up, the diary is still neat and tidy, and the next twelve months stretch out with few deadlines or expectations and lots of potential.
 {Love those textiles against the white woodwork. Pic: vtwonen}
I'm back at work but sure have enjoyed the post-Christmas calm. I've had a very productive time since the sale (which was a month ago already!), and have made five tea-cosies, a bag, three cushions, a chair pad (for a cane chair I picked up one bring-out-your-dead weekend) and four dresses.
No pics, strangely, of all the stuff I've been making. So I've sprinkled this post with pics of gorgeousness I've come across in my many meanderings trough design blogs. Yummy.
I've been reading lots (abandoned Haruki Murakami's Norwegian Wood for Barbara Kingsolver's The Lacuna — a much more comfortable fit) and we've been to the movies.  {You'd go crazy getting those stripes perfect — but what a great result! I love it. Pic: househome}
Loved The Social Network, and enjoyed The King's Speech, though a couple of days ago I read a great (blog?) article that compared it incident by incident to The Karate Kid, which made me laugh ... and rang true. In much the same way you can see Harry Potter is just like Star Wars re-told .... Anyway, other than the odd swear-word, TKS is a safe-as-houses movie if you want something to take your mother-in-law to see! And Geoffrey Rush will likely take out another Oscar for playing yet another kooky West Australian — when all the time I suspect he's only really playing Geoffrey Rush.
Enough about the fillums.
 {I'm collecting pics that show long, low bookcases — this is a beauty. Pic: Skona Hem}
A production of Romeo and Juliet started in King's Park last night — David is reviewing it for Monday's West. We were both remembering how, in 1972, we sat together in the UWA arts common room, sucking on cigarettes (Alpines for me and Marlboro for David) and swigging coffee at 8am, trying to write essays about R&J that were due in at 9am. The subject was the role of the messenger in the play.
I still had starry-eyed visions of myself (lol) as Olivia Hussey ...  ... in Zeffirelli's 1968 movie (which I wept buckets through with my friend Jill, sitting upstairs in the Gaumont on Prince of Wales Road in Norwich, munching on After Eights). So my essay was all hand-wringing and "OMG if ONLY that dickhead messenger had pulled his finger out and got to Romeo on time, he would have KNOWN Juliet was drugged not dead and he'd still be alive and they'd have got married and bought somewhere fabulous to live in Padua or even Venice with a canal outlook and it would all have been just wonderful ..."
I got a D, whereas David got an A+ for his ever-so-succinct "There would BE no play if the messenger had got there ..."
 I've been counting sleeps!
 My eldest son is already down there with our grandson, and our grand-daughter will be with us next week. Lily's coming down with Nick in a few days, and Will will arrive on Monday with two of his mates. My best friend Dace is coming for a weekend, and everyone else is welcome to arrive at a moment's notice.